Showing posts with label sewing. Show all posts

Wednesday, August 24, 2011

Found!

Caleb was cut off from the computer and his iPod for the night, so in his desperate boredom he wandered around my sewing room, looking at stuff.

And he found my camera! There was much rejoicing! For some weird reason I had set it down on a high shelf that I don't use much. Huzzah! (see, much rejoicing)
Graditude Wrap

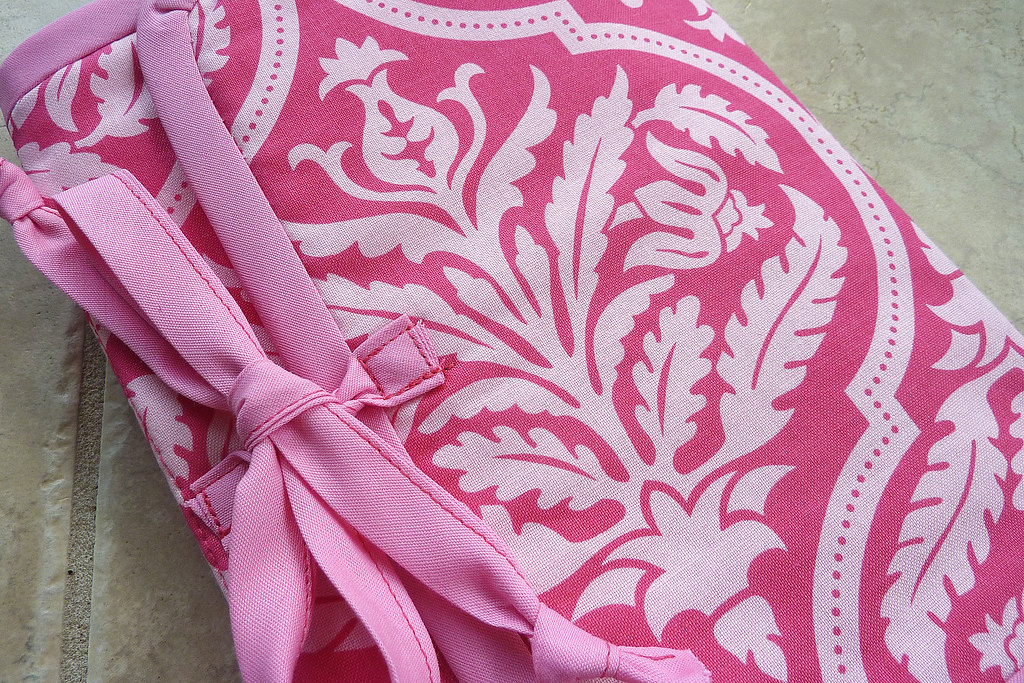
And with it I have the pictures of the Gratitude Wrap I made last week for my friend's birthday. I followed the tutorial by the wonderful Amanda Soule.  It's a fabulous little pattern - went together in an afternoon/evening even including a run to the store for some bias tape and three tries at using said tape!

Original Joel Dewberry Aviary in Pink (oh how I love his fabrics) for my friend who loves Pink.
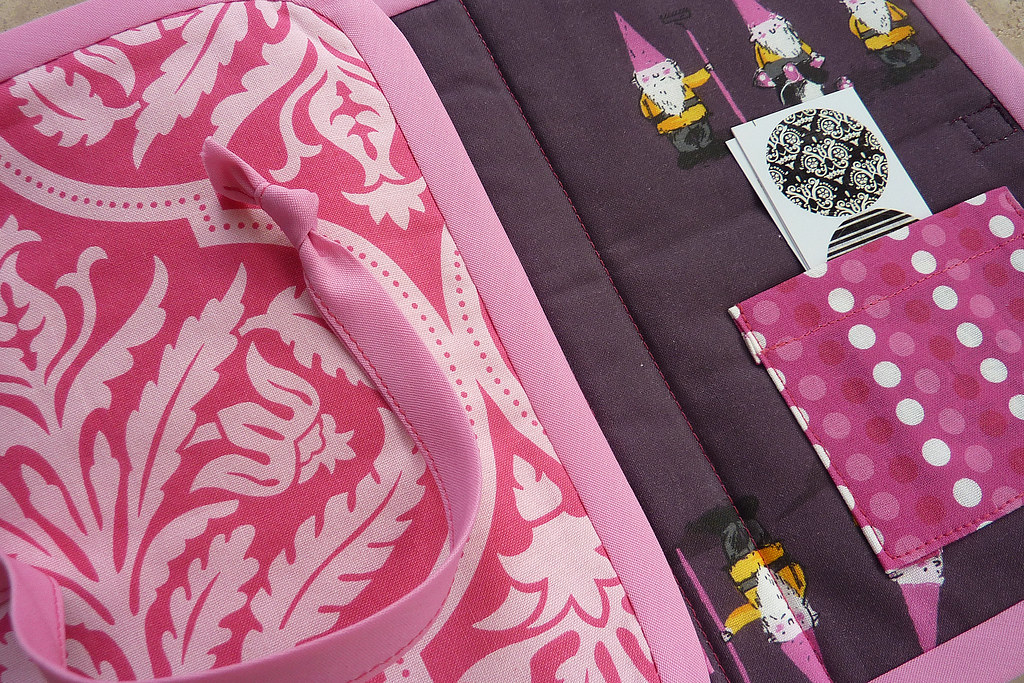
Graditude Wrap

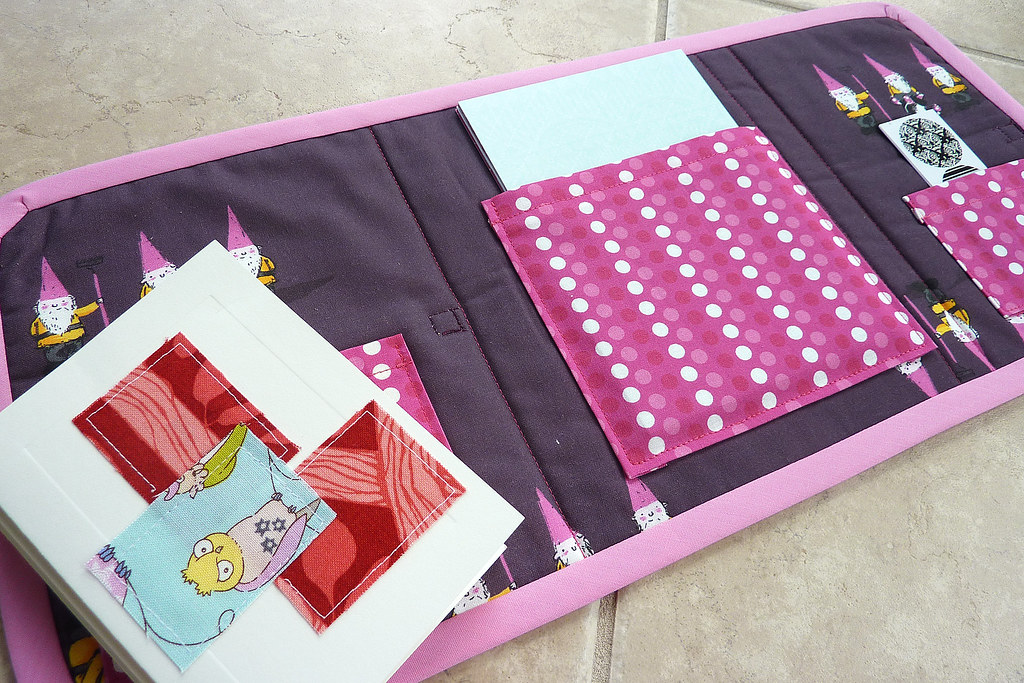
Cute plum gnomes inside!

Graditude Wrap

I had fun filling it with envelope stickers, 4x6 patterned scrapbook cardstock for notes, and a stack of hand made note cards.  My friend is always quick with a cute hand written note, so I thought she would enjoy the variety of stuff.

The bias binding - oh my.  The whole thing has rounded corners to make binding a little easier.....for those who can do it I suppose.  I am not one of those people.  I had all kinds of trouble.
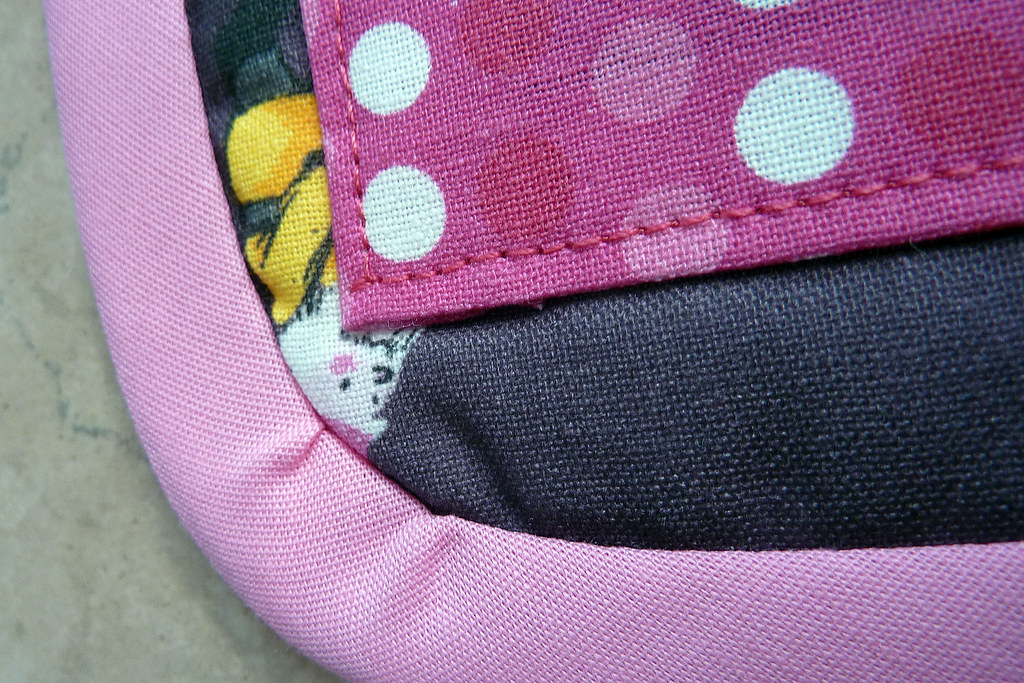
Graditude Wrap

First I actually made my own double fold bias binding out of a pink stripe that I thought was going to be awesome.  Oh, when you cut bias binding strips from a sequenced stripe that has a specific direction, you have half of the pieces flowing the wrong way when you cut it while folded.  ahem.  Once it was finally done and ready to attach though, I hated it with the Aviary.  So I ran out to the store to see if I could find a good pre-made match and was happy to get this solid pink.

Happy as a clam I attach the tape as Amanda instructs and after one corner find I've missed catching a bunch.  Rip it out - pull out my binding clips - rig up the whole perimeter and try again very slowly.  Well I caught it all, but I stood there looking at it and hated it.  Seriously NOT GOOD at machine binding, it was wobbly and I could just hear Heidi Klum saying, "It looks Home Sewn."  Rip it all out again.  Measure and am relieved that I actually have enough left to try again without having to use the piece with lots of holes up and down the edge.

This time I opened up the double fold tape all the way, and kind of stitched in the ditch of the fold on the inside - trying to ease around the corners.  Yeah, not very good at the whole easing thing, either.  But at least I didn't hate it after once around.
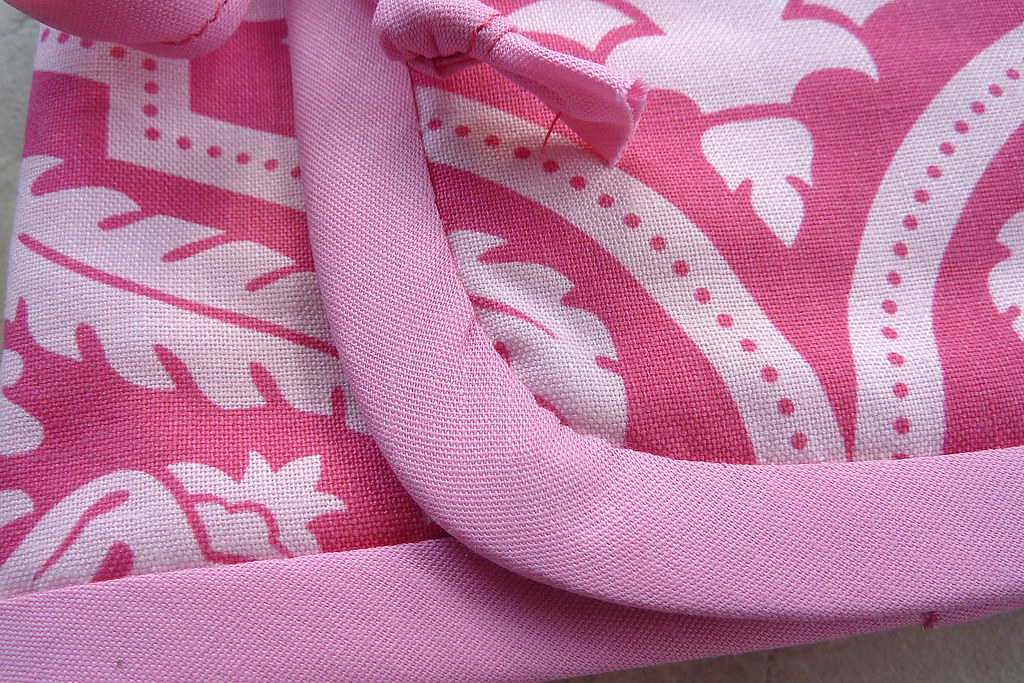
Graditude Wrap

Then I folded it around to the front as if I was finishing off a quilt, and hand stitched that front edge with the ladder stitch.   It is much easier to ease around those corners with hand work.  But I was kind of wishing they were just simple miters.  I know how to do those!  Once I placed the final stitch I sat back and was very happy.  This was how I wanted it to look!  A final pass over both the front and back with the steam iron settled it all into place very nicely.
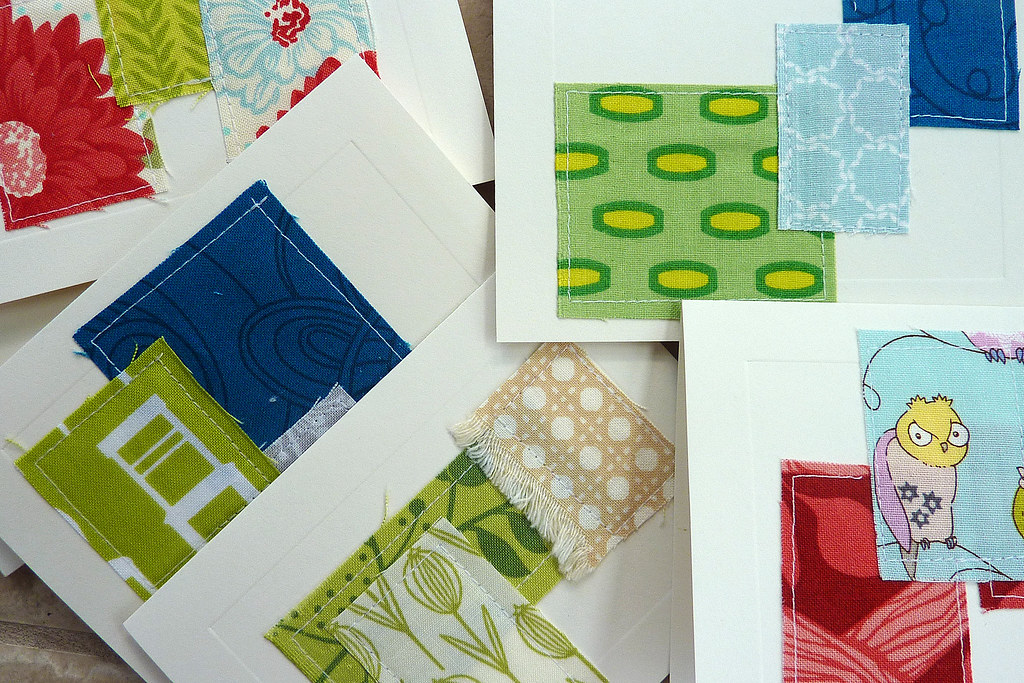
Graditude Wrap

I finished the whole thing off with some cards made with stitched on scraps. Very relaxing after the binding saga.

So glad Caleb found the camera so I could share the gift with you. I had such a good time making and giving it.

.

Sunday, July 18, 2010

Use my stash year : week 29


Much fun was had this weekend with my Gram and cousins. But first an update on all the sewing I did last week as gifts for my sister in-law Laura's birthday and my Gram.


I bought this pattern before we went to Hawaii, intending to make a camera case for myself but never got around to it. Laura likes to take lots of pictures of the kids, so I pulled it out again last week. It's the camera case wristlet by Keyka Lou. A really well written pattern.


I cut the pieces and made one for myself at the same time. Since I hadn't made the pattern before, it was good to have my own to 'practice' on before doing each step on Laura's gift. It hangs perfectly on your wrist and my camera fit perfectly.


There's even a little pocket on the back. This would also be cute to carry around some change and your lip gloss if you didn't need a camera. But I'm glad I made them both at the same time - I may have never gotten to my own if I had waited. I forget how MANY fiddly steps and thick seams are involved with bags.


Laura also loves flannel pillow cases - she uses one year round. I loved the funky butterflies! And her 4yr old is always asking to use her favorite flannel pillow cases, so I made a second with some crazy cupcakes that they can share.

The cool thing about these is that they only have 3 seams - and that includes the french seam! (I hate strings, especially in pillow cases. So I always do french seams.) And even better, there's not a single: evenly turn under raw edge in a cylinder step. Besides adding long boarders and loose strings, my least favorite sewing thing is turning under an even edge on any size tube. I learned this pillowcase method from a friend and I'll be sure to share it this week!


I learned and tried all kinds of things last week. On my Gram's table topper I did straight line quilting that kind of looks like bead board. Appropriately summery I thought. And since I was running out of time, I gave a machine sewn binding a try. It wasn't too bad! I like the look of hand stitched much better, but this certainly was quick.

Overall a very good week!

Busted: 4.396
Purchased: 0.66 - Dream On charm pack win
Net YTD: (31.014)

Monday, May 24, 2010

Hexagon needle book : tutorial

{or Use some of those things, already!}
also, blogger is being strange - this posted randomly, then went away as it was scheduled for Wednesday, and now is back, let's hope it doesn't disappear again


I had some extra d-rings from the netbook project, and also needed a second needle book for summer hexagon work. I was getting ready to make a plain old rectangle then realized I should make it a cute hexagon!


It's wool felt lined and also has two pages for pins and needles. Here's how you can make one, too. Please forgive some of these grainy process shots - I made it on a whim at night.


First, select two cute prints and baste your hexagons.
I made these with 1.5" hexagons - that's the measurement along one straight edge.

Then trace your shape and cut out two wool felt pieces the same size as your hexagon.


Iron your hexagon nice and flat, remove your paper shape, and pin wrong side to the wool felt. Slowly machine stitch about an 1/8" from the edges. You want to make sure you catch all the raw edges under on your hexie, no worries on the wool. Make two like this.


Now trace your hexagon again on some more felt. This time space them about 1.25" apart. Leave 5/8" wide strip in the center and trim away the rest. This will be your hanging loop. I like having the option of attaching this to my travel sewing stuff so it doesn't get lost in the bottom of a bag.


Fold the felt in half, then roll up one hexagon and stuff it through the d-ring. Make sure you do this before you stitch it all together!


Layer a hexagon print side down, folded felt center, then hexagon print side up. Machine stitch across the whole top edge a couple of times, close to the edge, but making sure you catch all four layers.


Now you have the cutest needle book around!

Saturday, May 22, 2010

I'm Chuffed & Use my stash year : week 21

I had that lovely echino come in, and did just a bit of travel-crafty sewing sewing this week, so the stash report isn't too exciting. But I was excited to page up and see that I've actually used over 72 yards so far this year!

Busted: 1.029
Purchased: 5
Net YTD: (19.052)


I never use 'chuffed' in daily speech but I always love it when I hear it and I'm super happy with how my new traveling netbook sleeve came out!


I used Elizabeth's tutorial that's on Sew Mama Sew. Her tutorials are always so well written. It only took me an evening, start to finish. I used Joel Dewberry home dec weight and a soft flannel for the lining.


Oh, hello!
I had to add him as a happy little face each time I opened the flap.


Now look at this awesome zippered pocket I added under that flap. It turned out perfectly! Izzy inspired made a cover for her iPad and linked to a great tutorial that I used, too.


The only other change I made to the original pattern was to add these d-rings. I want to make a strap for it.


Happy, safe netbook!

Tuesday, May 18, 2010

Traveling Art for Becket

I made a Traveling Art Show for Becket last night from an awesome tutorial at Bread and Buttons. It went together super fast! This is high on the list of things people suggest for in-flight entertainment.


I was going to use velcro to close it for Becket to work himself, but he actually should learn how to tie. You don't really learn that since all the shoes are velcro! So I ended up using some Hancocks Fabric twill tape I had saved.


We went to Staples this morning and he picked out a few of the things for the inside so far. We'll add some stickers and mini activity books, too.


He just saw me typing this up and ran to get it - he's opening and closing and testing it out. I may have to hide it until the trip!


I used some really yummy echino fabric with 1974 stash. I seriously want to win, but you may want to enter Penny's give away....you can win a little shopping spree at superbuzzy and get some echino for yourself!

Sunday, May 16, 2010

It's May Giveaway Day!

Welcome all for May Giveaway Day!


I must say I have an ulterior motive here. You know how newlyweds are so happy and they want everybody else married too. I'm having so much fun with my new obsession, that I want you addicted also! So, I have a couple of things for you.


It started innocently enough - I need some kind of handwork to keep me sane on an upcoming airline flight. There so many cute hexagon projects popping up lately, I had to give it a try.


And of course I found that it's the perfect little handwork to fill in for the carry-along I miss now that I don't knit much anymore!


With some of my first hexagons, I've made you a Lunchmate. Perfect little thing now that picnic weather is near. Open and unroll for a nice, clean spot when you're eating outside! Picnic tables can be a bit gross especially if you find a nice one under a pretty tree where birds may sit.


Leslie, at Fluff & Nonsense, made up the Lunchmate as a gift for her mom. And I thought it was awesome! I asked Leslie if it would be ok for me to copy the design for this little giveaway. She so kindly said yes, and then sent me the construction notes she had made for herself. Thank you Leslie! I put linen for the inside with the hexagons, and that yummy orange dot for the outside. Totally washable.


I also want you to give hexagons a try yourself. I made a little starter package (or add-on package if you're already addicted).


A packet of 25 card stock templates in the 1" size, and a nice stack of 70 modern 2.5" fabric squares.


To enter, please give me at least one idea to entertain a child on a long airplane flight. I want to work on my hexagons and not just entertain the 4, 11, and 13yr olds!


One person will win both of these prizes. I'm in Chicagoland and will ship internationally, but you need to have an email linked to your comment in some way so I can get a hold of you! I'll pick a winner on Thursday night - Good Luck!

Wednesday, March 24, 2010

Thank You Notes

This box of extra, formal thank you cards from our weeding has been sitting around for ages. They get used once in a great while. So I made some better with a glue stick and scraps.


After sticking a nice group of fabrics, I stitched them down. I only needed four today, but decided to keep going and make a bunch. Might as well since I was trashing the needle already.


I REALLY REALLY need to get on my bee blocks now. I've been playing travel agent full time for a few days. We have a trip to Maui and Kauai coming up and we need daily plans.

Friday, December 18, 2009

Bookmark Tutorial and One More Project

These are the last of the gift sewing I did for teachers. They really are Perfect Box Pouches - made with that great tutorial. Becket filled his teachers' with chocolates.


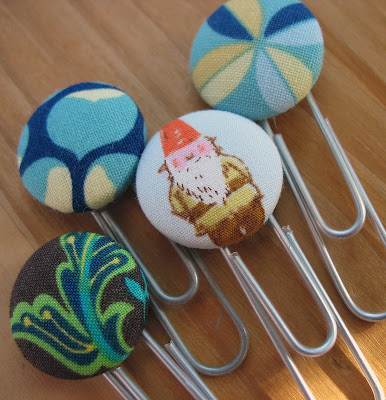
Kenton's teacher got some bookmarks. (LOVE LOVE how the box came out with that Mendocino)

I figured out a few tips when making the bookmarks, so thought I would share a little tutorial. First you need to get the cover button kit - I used size #14. You can also buy refills if you want to make more than four. The kit comes with that blue and white thing that you use in assembly.


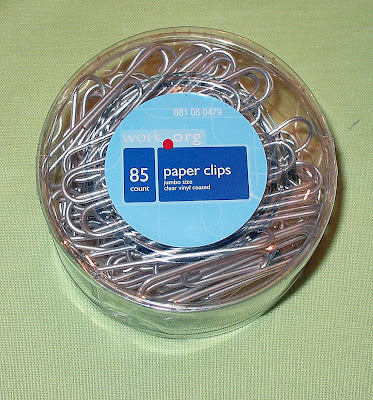
I found jumbo paper clips at Target. I liked these because they have a vinyl coating on them. No poky ends.


Use the template from the button packaging to cut fabric circles. I made a circle from freezer paper - iron it on and it says still while you cut.


Next, you just layer the fabric, button front, tuck the fabric, and finally the button back into the white tool. Use the blue thing to squash them all together. There's a little diagram on the button package. It's quite easy.


Now you need to heat up your glue gun until it has dripped a glue ball sculpture. That way it's flow-y enough to fill nicely.


Bend down the button eye with your finger, then put a blob of glue just below the center of the back. Lay the paper clip onto the blob and have something to prop it up a bit. I found that if you don't, the clip end will drop and the top will pop out of your glue. Do not push the paperclip into the glue with your finger. That just hurts.


Before it has hardened, I then go back and fill up the entire back and over the paperclip. If your glue is nice and hot, it makes a smooth solid back. Let them sit for a while to cool.


Watch out, it's addictive!

Well, school is out for Christmas break. So it's time for all those fun holiday activities (and then counting down the days until they return to school). Have a very Merry Christmas, may you enjoy all that you create!